Jordan Loewenstein, D.C. | La Jolla Chiropractor
Anterior Pelvic Tilt
Stretches & Exercises
A complete program for a forward-tilted pelvis and tight hip flexors — stretching, strength, and a loaded gym tier most routines leave out. Plus the part nobody explains well: how much the tilt itself actually matters, who it matters most for, and what a clinician does with it in the room.
What Anterior Pelvic Tilt
Actually Is
Anterior pelvic tilt means the front of your pelvis sits slightly lower than the back of it, giving you a little more curve in the low back and a little more of a backside. It is measured as the angle between the bony points you can feel at the front and back of your hip.
If you have found it on yourself, you are in good company — in the best measurement study available it was present in 85% of healthy men and 75% of healthy women, none of whom were in pain.
That is the most reassuring number on this page, and it is worth leading with. A forward-tilted pelvis is closer to a normal human shape than a fault, and most people who have it will never have a problem because of it.
What brings people here is usually not the angle itself. It is a low back that aches by mid-afternoon, hips that feel locked up after a long drive, or a front-of-hip tightness that never quite goes away.
Those are worth working on, and the program below is what to do about them. Stretch what is tight, strengthen what is weak, train the control, and keep the day moving. That combination is what tends to work, whatever your pelvis is doing.
Stretch the front of the hip, strengthen the back of it, and keep adding load. The stretching helps how things feel. The strength work is what changes what your hips and back can tolerate. Most programs online do the first part and stop, which is why people spend months on it without much changing.
Break up long sitting. Getting up every 30 to 45 minutes matters at least as much as any exercise on this page, and it is free.
Give it eight to twelve weeks. Strength adaptations are slow. If you are still at the same weights in week ten as week two, that is the thing to fix.
Does The Tilt Matter
For You?
This is the question a good clinician asks, and it is a much better question than “do I have anterior pelvic tilt?” Plenty of people have the tilt and no symptoms.
Some people have the tilt and it is genuinely part of their problem. These checks help you work out which group you are in before you build a program around it.
Does changing the position change the symptom? This is the important one. Stand as you normally do, then gently tuck your tailbone under so the low back flattens a little, and hold it for thirty seconds.
If your symptoms noticeably ease, the position is part of your picture and the strength work below is aimed squarely at you. If nothing changes, something else is likely driving it.
Can you move both ways easily? Roll the pelvis forward and back a few times. If you can move in and out of the position freely, nothing is stuck. That is a habit and a strength pattern, which are both trainable.
Does standing still make it worse? Symptoms that build over ten or fifteen minutes standing in one spot and ease as soon as you walk point at endurance and load tolerance. That responds very well to the program below.
Where does one finger land? Point to the worst spot with a single fingertip. Low back either side of the spine is usually muscular and load-related.
Deep in the front of the hip or groin is a hip joint conversation. Down the back of the leg past the knee is a nerve conversation and belongs in an exam.
Most of the internet treats anterior pelvic tilt as a universal problem, and most of the pushback treats it as never mattering. Neither is right. There are groups where clinicians take it seriously, and for good reason:
People whose pain is clearly extension-related. If arching, standing, or lying on your front reliably provokes it and tucking the pelvis reliably eases it, the position is doing real work in your symptoms. This is the largest group by far.
Athletes in extension-heavy sports — gymnasts, dancers, rowers, fast bowlers, anyone repeatedly loading the back in extension. There is a real mechanistic link to overuse back pain in these populations.
People with hypermobility, where a forward tilt is often a stabilising strategy rather than tightness, and where stretching can make things worse rather than better.
Postpartum, where tilt usually travels with abdominal wall and pelvic floor changes and needs to be handled as a whole system rather than a posture.
If you are in one of these groups, this page is a reasonable starting point but a hands-on assessment is worth more than any program you find online.
Where Chiropractic
Actually Fits
The most useful thing a hands-on assessment gives you is not an adjustment — it is an answer to the question you cannot work out on yourself: are your hips and pelvis genuinely part of this, or is something else driving it?
In practice it is straightforward. I measure how much movement you actually have — how far the hip extends, how far the low back moves in each direction, and where that movement runs out. Then orthopaedic testing, to work out which structures are involved and, just as usefully, which ones are not.
Then you lie face down and I look at how the pelvis is sitting. Is one side riding higher than the other. Is it rotated. Do the legs sit level. An asymmetry there tells me where to focus, and often explains why one side has been doing more of the work than the other.
None of it takes long, and by the end we know whether your hips and pelvis are genuinely part of the picture or whether something else is driving your symptoms. That is the difference between a program built for you and a program pulled off the internet — including this one.
From there, most of the work is teaching your hip and low back to move independently, then loading it.
That is the same approach a good physical therapist takes, and the evidence behind it is decent rather than spectacular: structured movement and motor control programs reliably beat doing nothing, and perform about as well as each other. The program you will actually stick to is the one that works.
The most direct evidence sits with soft tissue work, not adjustments. A randomised trial that released the hip flexors, deep hip rotators and hamstrings measured a small reduction in pelvic tilt immediately afterwards, still present a day later, where the control group did not change.
A separate study releasing trigger points in the iliacus — one of the hip flexors — recorded a drop of roughly two to three degrees in measured tilt along with improved hip flexor length.
Both were small and measured over a single session rather than weeks, so treat them as encouraging rather than conclusive. But they are the closest thing that exists to evidence that hands-on work moves this, and they point at the soft tissue side.
Joint work does something different. Mobilising the hip joint produces an immediate jump of around 14% in glute max strength and 17% in glute medius strength — almost certainly by releasing the reflex inhibition that a stiff or sore joint creates.
Those studies were done in people without symptoms and measured within minutes, so it is best understood as a window that opens rather than a change that lasts. It is only worth anything if you train in it.
And this is exactly how the guidelines say to use it. Both the UK and US clinical guidelines for low back pain recommend manual therapy as part of a package that includes exercise, and explicitly not as a treatment on its own. Combined care is the endorsed version.
The combination is the point. Hands-on work makes the hip and back easier to move and load, and the loading is what changes what you can do. Neither half does the job on its own, which is why the program on this page pairs them.
Build Capacity,
Not Correction
The goal is not to change your pelvic angle. It is to build hips and a trunk that tolerate load, so standing, sitting and walking stop costing you anything. Work through the tiers in order. Move up when the current tier feels easy and leaves you no worse the next morning, not on a calendar.
Bodyweight, at home, most days. This tier teaches your trunk to resist the low back arching while your hips move independently — which is the actual skill underneath all of this. Move on when you can do every one of these without your low back joining in.
 Watch demo
 Watch demo
 Watch demo
 Watch demo
 Watch demo
Three or four days a week. One leg at a time and a resistance band, which is where most of the real strength gain starts. Move on when you can complete every set without your form falling apart in the last few reps.
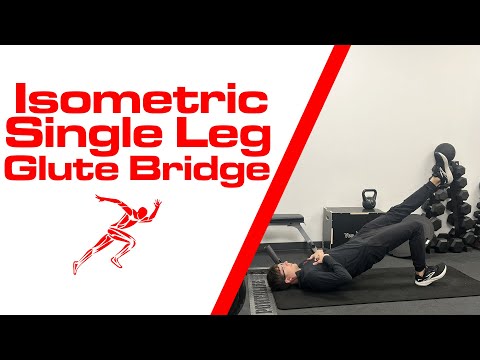 Watch demo
 Watch demo
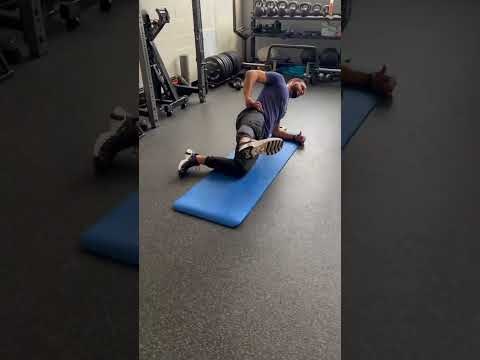 Watch demo
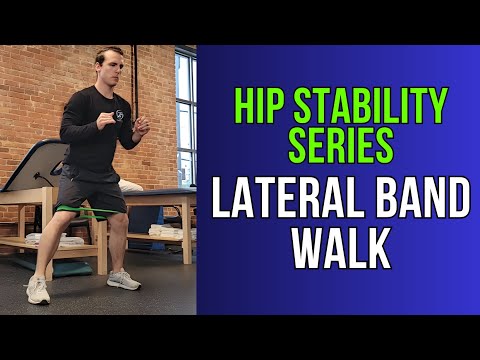 Watch demo
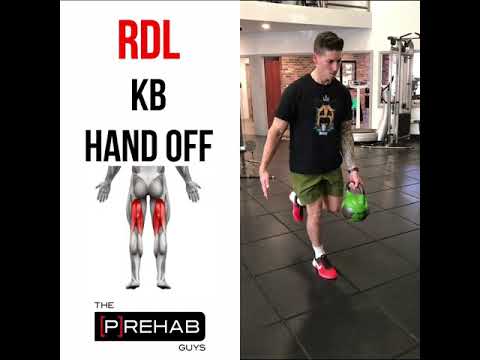 Watch demo
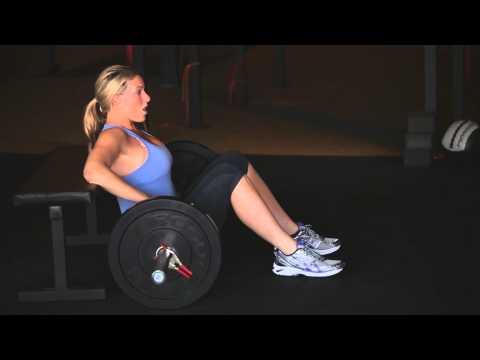
Two or three days a week, in a gym. This is where the actual adaptation happens, and it is the tier almost every anterior pelvic tilt routine online leaves out — which is why people do bridges for six months and wonder why nothing changed. Add weight slowly and keep the reps clean.
Yes, and there is a clean reason why. When researchers compared muscle activity directly, the barbell hip thrust produced roughly 229% of maximum voluntary glute activation, against about 130% for the back squat. The mechanism is mechanical rather than magical: in a hip thrust the knee stays bent throughout, which takes the hamstrings out of their strongest position and leaves the glute to do a disproportionate share of the hip extension.
A bodyweight bridge is the same movement pattern with almost no resistance. It is a fine place to start and a poor place to stay. If you have been bridging daily for months, the problem is not that the exercise is wrong — it is that it stopped being hard a long time ago.
What loaded glute work has genuine evidence for is reducing pain and improving function. Several randomised trials in people with low back pain have found that adding glute-focused strengthening to a standard program beats the standard program alone.
What it has not been shown to do is change your resting pelvic angle — when that specific link has been tested, it has not held up. So load your hips because it makes them work better, not because it will straighten anything out.
 Watch demo
 Watch demo
 Watch demo
Two sessions a week of Tier 3, with Tier 1 kept as a warm-up, is enough. Progress by adding a small amount of weight when the top of your rep range feels controlled — not by adding more exercises. If something hurts sharply, stop that movement and get it looked at rather than pushing through.
Why Stretching
Still Belongs
Stretch the front of the hip, strengthen everything behind it, and keep adding load. Those two halves work together, and a program that skips either one is only doing part of the job. The strength tiers above are the part most routines leave out — but the stretching is not filler, and it earns its place.
The hip flexors run across the front of the hip and attach onto the pelvis and lower spine. Sit on them for eight hours and they get stiff, guarded and unhappy, and standing up straight afterwards feels like work.
Stretching addresses that directly. It reliably improves how far the hip extends, it takes the edge off that locked-up feeling at the end of a long day, and it costs you five minutes.
Hip flexors — psoas and rectus femoris, across the front of the hip. Kneeling hip flexor stretch and the tall-kneeling quad stretch. This is the group everyone knows about, and the one that usually feels the most obviously tight after a day at a desk.
Glutes and deep hip rotators — figure-4 and pigeon. Often overlooked in favour of the front of the hip, and often just as involved in a stiff, achy low back.
Hamstrings — they attach to the back of the pelvis and pull in the opposite direction to the hip flexors. Worth including for balance rather than because either group is the villain.
Thoracic spine — cat-cow and seated extension. If your mid-back does not move, your low back does more than its share of the work.
Do these most days. Five to ten minutes is plenty, and it works best after activity or in the evening rather than cold first thing in the morning.
The full set of hip flexor stretches, with a video for each and the detail on how to hold them, lives here: Tight Hip Flexor Stretches & Exercises. And if one hip sits higher than the other, or you have been told one leg is shorter, that is covered here: One Leg Shorter Than The Other.
You will find people online claiming that stretching definitely fixes a tilted pelvis, and other people claiming it has been proven useless.
Neither camp is on solid ground. The studies on both sides are small — the most careful review of the whole question turned up four eligible studies with 95 people between them and rated the certainty of the evidence as very low.
So the sensible response is not to pick a side, it is to cover the bases: stretch what feels tight, strengthen what is weak, train the control, and keep moving through the day. That is what the program on this page does, and it is what tends to work in practice.
One finding does stand out as useful. When researchers combined strength training with coordination and control work, it moved the needle about twice as much as strength training alone. That is a small study, but it points the same direction as everyday clinical experience: the combination beats any single piece of it.
Do This,
Not That
None of the things on the right are harmful — they are just where people spend effort that would pay off better somewhere else. If you only change two things from this whole page, make it the first two on the left.
If You Drive Or
Sit All Day
If you spend your day in a car or a chair and your back complains about it, you are in very good company. Professional drivers report low back pain at around 39% in the past week and 53% in the past year — far above the general population.
Worth knowing what the research blames: mostly whole-body vibration, sustained loading, and sheer hours in one position rather than anything about the shape of your pelvis.
That is actually good news, because hours and vibration are things you can chip away at. It also means you do not need to fix your posture before you are allowed to feel better — you need to interrupt the exposure and build up what your back tolerates.
Break the position, not the posture. Standing up every 30 to 45 minutes for even sixty seconds matters more than how you were sitting during those 45 minutes.
Raise the seat slightly so the knees sit a little below the hips. In a car that usually means lifting the seat base rather than reclining the back. It reduces how far the hip has to bend and takes pressure off the front of the joint.
Use lumbar support to allow a position, not to enforce one. A small rolled towel behind the low back is fine. It should feel like something you can lean into and out of, not a brace holding you still.
On long drives, use the fuel stop properly. Two minutes walking and a few standing hip extensions at every stop breaks up the vibration exposure that is doing most of the work.
Do Tier 1 in the evening rather than the morning. If your day is spent folded up, five minutes of dead bugs and bridges after work does more than the same five minutes before it.
If your day is mostly desk-based, there is a longer version of this with the workstation setup and the upper body included: Posture Fixes for Desk Workers and Students.
And if the same desk has left you with a bump at the base of your neck, that has its own program too: Buffalo Hump & Dowager’s Hump.
Anterior Pelvic Tilt
Questions
On its own, no — it was present in 85% of healthy men and 75% of healthy women in the best measurement study available, none of whom were in pain. It is a normal variation in human shape.
That said, if you have symptoms and they clearly change when you change the position, then it is worth working on for you specifically. That is the distinction that matters, and it is what the self-checks above are for.
Yes, within reason — and more importantly, you can change how it feels and what it lets you do. The approach with the best support is a combined one: stretching what is tight, strengthening the glutes and trunk, and training the control.
When researchers combined strength work with coordination training it moved the needle about twice as much as strength alone. Alongside that, you can substantially change how strong your hips are and how much standing, sitting and walking you tolerate comfortably, which is usually what people came for in the first place.
They are a good starting point and glute-focused programs have reduced pain and improved function in trials on people with low back pain. The catch is that a bodyweight bridge stops being a meaningful challenge within a few weeks.
If you want the benefit to keep coming, it has to get harder — single leg, then banded, then a loaded hip thrust. Most people who feel like bridges did nothing for them simply never progressed past them.
For glute activation specifically, yes. Direct comparison showed the barbell hip thrust producing roughly 229% of maximum voluntary glute contraction against about 130% for the back squat, because the knee stays bent through a thrust and the hamstrings contribute less.
Squats remain excellent for everything else — this is not a reason to drop them, just a reason to add thrusts if the glutes are what you are after.
They are certainly related — the hip flexors cross the hip and attach to the pelvis, so it is a reasonable mechanism, and the two very often turn up together. How much one drives the other has not really been settled by the research, which is small and mixed on the question.
In practice that argues for covering both rather than betting on one: stretch the hip flexors because it helps how the hip feels and moves, and build the strength and control behind it at the same time.
It helps in three ways, and it is worth being precise about which. First, working out whether the position is actually part of your problem — a hands-on test you cannot run on yourself.
Second, soft tissue work: the small studies that have measured pelvic tilt before and after hands-on treatment found the reductions came from releasing the hip flexors and deep hip rotators, not from adjusting.
Third, joint mobilisation produces an immediate jump of roughly 14 to 17 per cent in gluteal strength, which makes the exercise that follows more productive. What it will not do is permanently reposition your pelvis or replace the strength work, and the guidelines are clear that manual therapy belongs alongside exercise rather than instead of it.
Symptoms often ease within two to four weeks of moving more and breaking up long static positions. Real strength change takes longer — judge the program at eight to twelve weeks.
If you are still lifting exactly the same weight for the same reps in week ten as in week two, that is the thing to fix rather than the timeline.
If pain runs below the knee, if you have numbness, tingling or weakness in the leg, if there is a sharp catch deep in the front of the hip, or if things are getting worse over weeks rather than better.
Also worth an exam if you have worked at this consistently for three months and nothing has shifted — at that point the assumption behind the program is probably wrong, and that is worth finding out.
Not Sure Which Part
Applies To You?
A program works much better once you know whether the position is actually driving your symptoms — and that takes about ten minutes to work out in person. A first visit sorts out what is going on and which tier you should start at. Evening and Sunday appointments available.